• If you haven't done so already, please add a location to your profile. This helps when people are trying to assist you, suggest resources, etc. Thanks (Click the "X" to the top right of this message to disable it)

How to fix a broken lower strap bracket

Status
Not open for further replies.

DanL50

Newbie
Joined
Oct 31, 2021
Messages
7
Reaction score
6
Location
Las Vegas and Minneapolis, USA
New here and looking for some advice please.
I have a 1960's Pollina, (Ser.# 1524), 41/120, 4/2, 15.3" (39cm) keyboard.
It seems in excellent shape, bellows and keys all good, but the lower strap bracket is broken.
It is a U shape with two posts through the body. One post has broken off.
How do I best access the inside to free the remaining post and install a new bracket, or is this more complex than it seems?
A second question is whether to keep this instrument or get another. I last used it as a 10-12 year old in the early 1960's.
Now with time on my hands at over 70 years, I thought I'd give lessons and playing a try again. The instrument is small - a lady/kid version, I think? - but I'm short and have small fingers and the fit and key size seem fine. Not thinking about selling at all, but is it worth the repair cost for the bracket?
Thank you.
 
OK...spent some research time on-line and removed the bellows to have access to the back of the strap bracket. Easy to fix with a temporary fitting until I get a replacement part.
BUT, on opening, I see many of the leather reed valve flaps curled or deformed. Researched that online, and given the what I find, I'm planning to 3D print dimensionally matching replacements in TPU, a very flexible, dimensionally stable material. Will update as I learn more...
Thank you.
 
Last edited:
that must be a first: printed TPU valves? I know this stuff only from transparant phone cases

interesting how this will pan out

you might want to try and salvage the leathers for the lower reeds, as plastic and/or TPU will rattle more on those
 
Quite a few Pollinas available for sale on the Liberty Bellows website.
They look pretty solidly made!?
 
No need to print, as valve leather in various sizes (and anything else) is available online ?
 
OK...spent some research time on-line and removed the bellows to have access to the back of the strap bracket. Easy to fix with a temporary fitting until I get a replacement part.
BUT, on opening, I see many of the leather reed valve flaps curled or deformed. Researched that online, and given the what I find, I'm planning to 3D print dimensionally matching replacements in TPU, a very flexible, dimensionally stable material. Will update as I learn more...
Thank you.
Leather valves should have metal "booster springs", not plastic ones. Valves, booster springs and also strap brackets are standard parts available from several accordion parts stores. I get my stuff from Carini (carinidena.it) in Castelfidardo.
 
Thank you for all the quick responses. As I'm new to this and starting to research accordion repair, I find the mechanical aspect of accordions fascinating.
I now know that parts are readily available, but really want to experiment with custom 3D printed parts - my other hobby.
I'll likely replace just a few bad leathers to see/hear the effect. Thinking to replace one side only on a reed to compare the in/out sound. I can print different flexibility materials, different thicknesses to vary stiffness, add "spines" vs spring stiffeners, custom reeds for hi vs lo notes, etc. Many things to experiment with. And I'm still searching online as I think someone must have already done this.
I was a research guy and things mechanical draw me in. I'll post progress here in a new thread. I'll title it "3D printed Reed Valve Flaps"
Again, thank you for your feedback.
Fascinating what some people do with 3D printing. I have been printing for over 10 years now, and for accordions it's been mostly feet (they do tend to break, more so in music schools than anywhere else), chin register buttons and protective covers for chin registers. 3D printers are good at some things and not so good at other things. What doesn't work well are very flat/thin objects. Which is why I would never use mine for "reed valve flaps", which can be made much more easily from other objects like old overhead sheets (thin film sheets) which I used for presentations before we all had Powerpoint and digital projectors. My way of thinking when I need some object is first "Can I use something I already have and modify it?" and only second "Can I print it?".
 
96Bass - Yes, the accordion is small. I'm having trouble with the buttons. Smaller hands when I was 10.

debra - my printer easily makes very thin, flat objects. The current leathers are 0.75mm thick. I'll be printing 0.15mm layers, from 3 to 5 layers (0.45mm to 0.75mm plastic thickness) with three different flexibility TPU's to test functionality. Also going to test feathered edges for sealing, or ridged edges/spines for reducing flutter if it occurs, etc, etc. For me, this sort of thing is a technical adventure - learning and discovery.
Will start a new thread soon. One design pic attached....0.45mm thick...can print many dozens at once.
accordion reed valve flap 7x39x0.4 v3.png
 
New here and looking for some advice please.
I have a 1960's Pollina, (Ser.# 1524), 41/120, 4/2, 15.3" (39cm) keyboard.
It seems in excellent shape, bellows and keys all good, but the lower strap bracket is broken.
It is a U shape with two posts through the body. One post has broken off.
How do I best access the inside to free the remaining post and install a new bracket, or is this more complex than it seems?
A second question is whether to keep this instrument or get another. I last used it as a 10-12 year old in the early 1960's.
Now with time on my hands at over 70 years, I thought I'd give lessons and playing a try again. The instrument is small - a lady/kid version, I think? - but I'm short and have small fingers and the fit and key size seem fine. Not thinking about selling at all, but is it worth the repair cost for the bracket?
Thank you.
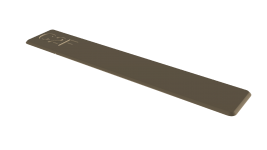
There's another possible way to fix the lower strap bracket if you want to make your accordion playable without a huge expense that may occur in opening it up. Perhaps you might remove the existing broken bracket and replace it with one glued on. I've had occasion to use some of the more modern glues recently and am surprised at their utility. A large overhaul of an inexpensive instrument may not make a lot of financial sense so you may just want to address the direct problem.
 
96Bass - Yes, the accordion is small. I'm having trouble with the buttons. Smaller hands when I was 10.

debra - my printer easily makes very thin, flat objects. The current leathers are 0.75mm thick. I'll be printing 0.15mm layers, from 3 to 5 layers (0.45mm to 0.75mm plastic thickness) with three different flexibility TPU's to test functionality. Also going to test feathered edges for sealing, or ridged edges/spines for reducing flutter if it occurs, etc, etc. For me, this sort of thing is a technical adventure - learning and discovery.
Will start a new thread soon. One design pic attached....0.45mm thick...can print many dozens at once.
...
I misunderstood your earlier message. You talked about "the leather reed valve flaps curled or deformed" and I thought you meant plastic booster springs used with leather valves, not the leather valves themselves. I suggested not to use plastic booster springs but metel. But now I understand that you want to replace the leathers themselves by printed plastic valves. This might work for the larger ones (like 0.45mm thick, but in accordions that use plastic valves the smaller valves you can buy are significantly thinner than even a single layer you can print. (And you normallly need to print a few layers to have a valve that doesn't leak air.) So I believe this is a bad idea. Plastic valves, pre cut, are so cheap that it really does not make sense to print them yourself. For the larger valves... maybe you can do it. Let us know how it goes.
 
I misunderstood your earlier message. You talked about "the leather reed valve flaps curled or deformed" and I thought you meant plastic booster springs used with leather valves, not the leather valves themselves. I suggested not to use plastic booster springs but metel. But now I understand that you want to replace the leathers themselves by printed plastic valves. This might work for the larger ones (like 0.45mm thick, but in accordions that use plastic valves the smaller valves you can buy are significantly thinner than even a single layer you can print. (And you normallly need to print a few layers to have a valve that doesn't leak air.) So I believe this is a bad idea. Plastic valves, pre cut, are so cheap that it really does not make sense to print them yourself. For the larger valves... maybe you can do it. Let us know how it goes.
Ah, debra.
Thank you. I've had many hobbies...scuba, 3D printing, e-biking, pistol crossbow target shooting, electronics, photography and now hopefully music again. Thinking about it now, per your comments, I realize that my single real hobby is exploring and modifying the equipment related to all those other hobbies rather than the hobbies themselves! I guess I'm a tinkerer inventor...definitely not an accordion player (yet).
(example...I twist my own crossbow strings rather than buy them for 3 bucks :) )

Just noticed Eindhoven...many years ago I was there on a business trip. I worked in R&D at a major US food company and we looked at some ingredient technology there. Don't remember the company. Our cabbie became a best buddy when I mentioned the Battle of Medway (hobby:naval history) where the Dutch navy obliterated the British fleet...1660's...
 
Status
Not open for further replies.
Back
Top