• If you haven't done so already, please add a location to your profile. This helps when people are trying to assist you, suggest resources, etc. Thanks (Click the "X" to the top right of this message to disable it)

Making your own reed wax

W-h-o-a -- 55 Gal! I don't know what I would do with all of that.
Thanks, I don’t think I was clear. I’d really like to find 5-gal cans or a 55-gal drum of raw. The gal cans of “bolied” linseed oil are fine for the small projects.

BTW, speaking of spraying finishes I once bought a plastic pump sprayer from Home Depot, opened it at home and found that some had bought it, used it for deck stain, then returned it without even cleaning it. HD told me people do that all the time, using HD as a free rental store. Dirtballs - I couldn’t live like that…
W-h-o-a -- 55 Gal! I don't know what I would do with all of that linseed oil. I wonder what it would cost. I think the Raw is getting harder to get. Did you notice the price for 1 Gallon of the Raw ($40!). Just a year or two ago, I paid $12 for one gallon. I would guess that in a short time, the Raw will be taken off the market for some reason or another.

So many people "use the system" to get a tool/product and then return it for a full refund.

This is an experience that was a bummer for me. I replaced my old rickety wooden pull down ladder that gave me access to the garage attic. I went to the lumber yard and bought a nice Werner aluminum attic pull down ladder. My garage has 10 ft. ceilings. When I got the "new" ladder home I found out someone had returned the ladder for a refund. However, I couldn't use the ladder, because the legs were cut off for an 8 ft. ceiling. So, I took it back and got a really "brand new" ladder and was able to cut the legs off for a 10 ft. ceiling. Besides the pain, of returning the used one, the store has to take up a loss. They can't do that or go out of business, so they have to up their prices -- and who pays the increase -- we do.
 
I don’t want to sound discouraging but making a quality hard case from wood could be a major project, depending on the tools and shop space you have and your level of skill and experience! I have a well-equipped 24x62’ shop but would hesitate to build one myself.

One option is to hire this out to an experienced woodworker. We tend to buy hight-quality furniture pieces from a few local shops and even they sometimes order the best from Amish shops out of state.

Note that woodworking can be a quite dangerous process without training and experience. Wood dust can also be hazardous to the lungs without good dust collection and personal protection. I installed a $4000+ dust collection system and still wear a good P100 industrial respirator when working.

The machining and cutting is not difficult with the right equipment but for durability and stability (minimize warping) I’d probably make all joints something other that simple butt joints. This may require at minimum a good shaper or router table and at best advanced joinery such as dovetails, finger joints, or splines/dowels/biscuits (for alignment). Always work with well-dried wood, kiln dried is best to avoid warping aa it dries. Pay good attention to the grain direction and understand that wood naturally changes dimensions with moisture changes. Seal the wood well to prevent it from warping with changes in seasons.

When acquiring wood it’s usually best to buy about 10% more than your design to allow for working around defects and surprises. Be careful of wood with warps - bows, twists, crooks, etc. I generally acquire wood thicker than I need, resaw it to thinner pieces on a big bandsaw, then plane it to thickness and smooth on my drum sander. Note that many boards have internal drying defects and stresses which may be released while processing.

If you want mahogany keep in mind that it is very expensive and some places out to make a buck will sell mahogany lookalikes. I keep on hand a huge supply of true Honduran mahogany, clear, dry, and stable purchased from a long-time friend and trusted wood dealer who stopped by here half way through a 12 hour trip and let me buy what I wanted from a large load - I mostly bought 10-12’ long planks 2-3” thick. What a blessing!

Other cheaper, lighter and still useful woods include but are not limited to eastern red cedar, yellow poplar. Note that the stability of many woods depends on how it is cut from the tree and how it is dried - something hard to judge unless you saw it yourself. (I have a sawmill behind my barn and learned a lot from years of sawing.) Note that MANY nice looking furniture, boxes, and cases are made from highly stable quality plywood faced with beautiful/high quality thing wood such as mahogany veneer. The inside might also be covered with veneer and or cloth or other protective padding.

Line the inside with some kind of soft cloth or padding to protect the finish from the wood and add extra padded pieces to fit the shape and support the accordion, especially the “bend” at the back between the keyboard and the bellows..

Use sturdy hinges, handle, and especially clasps and design it so if the lid pops opens accidentally the top of the box will be against your leg rather than the other way so the accordion doesn’t tumble out into the street.

One way to make a precision box where all sides fit perfectly is to make a completely closed box then separate the top and bottom with a precision saw joint all the way around. This can be tricky. An extra step after separating the halves is to devise some type of seal or short splines to prevent air, dust, and moisture entering from the outside.

I’ve made a number of boxes but never considered an accordion hard case. All my knowledge about accordion cases comes from my own accordion (actually two, one acquired just a few days ago) - both came with hard cases with padding inside to keep the protect and keep the accordion from shifting when transported.

I personally, on the advice of my accordion mentor (I’m a beginner), called Liberty Bellows, discussed my needs with the owner who suggested an excellent padded soft case I think is made from very tough cordura fabric, zipper close, well supported with heavy straps that run completely under and around the case, pad-lockable, with an outside zipper pocket for accessories. I told him the type and size of the accordion and he suggested a model which I’m happy with. It’s also much lighter that the existing hard case. It was much less expensive than purchasing high quality mahogany wood and far quicker than designing, machining, constructing, and finishing a good case! Just MHO!’

JKJ

Thanks for the thorough reply! You're probably right about building a case that would work well and do the job being perhaps more trouble than it is worth, or just too difficult with materials on hand. My building skills mostly extend to combat robots, which isn't really the same thing!

A good soft case probably is an option, too, I just like the look of the hard cases more. I'm thinking also of adapting a piece of high end rolling luggage that doesn't get used much because it's so high end it's too heavy. I can add padding and a kind of "bulkhead" so the accordion doesn't slide around, plus some foam and fabric padding.
Adding padding that snugly fits your accordion to an existing well-built case is a good solution in terms of protecting the accordion. However, weight is a consideration for many of us. The light weight is a nice thing about standard cardboard/wood accordion cases and even more so about padded bags.
 
Is there much difference between using white or yellow beeswax? I've been using 1 part rosin to 4 parts white beeswax pellets along with a dash of boiled linseed oil. I got that ratio from previous threads about making wax on this forum and it has worked well for me so far. I've experimented with going a little heavier on the rosin, up to 33% of the mixture and as far as I could tell there was little difference in the way the wax behaved.

The only thing that has had me wondering is the color of my wax, which comes out an off white/cream color when it hardens. Most accordions you open up have a yellow/caramel-ish color, as did the wax the boss made at the old shop but with that being said I have seen a few accordions in the past with light colored wax. Am I correct in assuming that the color is coming primarily from the beeswax? And that manufacturers are generally using yellow beeswax? Does it really matter?

I have no personal knowledge of the pros or cons of white vs yellow beeswax for accordion use.

Every few years I melt and filter the cappings wax (the most pure) saved from processing honey from my beehives, and pour filtered wax into molds to save. I filter hot wax first through a fine screen then through paper filters - the paper I use is the same I used when I filtered milk kindly provided by my goats.

What I’ve learned about white beeswax in case it helps: Natural beeswax is yellow and has a pleasant natural odor. White beeswax has less odor. My understanding is yellow beeswax is processed to produce white beeswax, preferred by some due to the appearance who use it in candles, cosmetics, etc. Yellow beeswax is preferred by some as better for the skin. I read once that white beeswax created from natural beeswax by heating and high-pressure filtering or bleaching, either chemical or by strong UV light. I stick to the yellow in the shop for things like finishes. If waxing reed blocks I’d go with the yellow.

If you every get down towards Knoxville give a holler and I’ll give you some yellow beeswax if you need some.

I haven’t waxed any reed plates yet but might soon - my fantastic accordion tech wants to teach me how he does so I can more easily replace leathers, etc. I have a bunch of rosin from violin and cello bows.

JKJ
I prefer the yellow beeswax candles myself, because they make a room smell like honey and wildflowers.
 
Well I just now used a 4:1 ratio of wax:rosin

Made 5 pounds of it and ran out of cup cake holders. Scrambled to find some paper plates to pour wax into.

In the future I would:

1) make 2 pounds at a time
2) use separate pots to melt substances and then combine when both are fully melted
3) not use our good pots and spoons 😨IMG_1691.jpeg
 
Last edited:
Question:

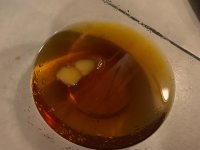
The wax I’ve used seems to do the job, however much of the resin seems to separate from the beeswax. Globs of brown caramel resin at the bottom of the pot. I believe it’s hot (250 Fahrenheit), any ideas ? Do I just need to buy a more high quality resin ?
 
Hmmmmm.......250F = 121C......... you may be changing the wax/rosin structure.....wax melting at 144 - 147F (62 - 64C) and rosin, depending on type molten at 210 - 250F (100ish - 120).........but then, that rosin might have a higher melting point, so heat more and see......
Maybe heat them separately and combine when liquid.......apparently rosin can be pretty flammable stuff.
 
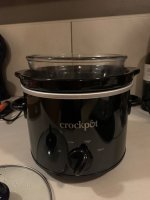
And you're melting the resin before throwing the wax in right? I make wax in a small crockpot I picked up at Goodwill for $5 and I find it takes about 30 minutes for the resin to fully melt before I add the beeswax. Even then, the resin is still quite sticky and can clump a bit so I have to give it a pretty vigorous stirring to get a good mix.
 
And you're melting the resin before throwing the wax in right? I make wax in a small crockpot I picked up at Goodwill for $5 and I find it takes about 30 minutes for the resin to fully melt before I add the beeswax. Even then, the resin is still quite sticky and can clump a bit so I have to give it a pretty vigorous stirring to get a good mix.
probably that I botched it - going to try two pots next time and then mix. When I added beeswax to molten resin, it cooled off the mix too much and solidified
 
Back
Top